Creating a diagonal line in a table cell in LaTeX can be a useful and visually appealing way to separate and organize content. Whether you’re working on a research paper, a report, or any document that requires tabular data, knowing how to add diagonal lines to table cells can significantly enhance the presentation of your information. In this blog post, we will explore diagbox package that is used for this purpose.
Using ‘diagbox’ package
In LaTeX, the \diagbox command is used for creating diagonal lines in table cells. This command is part of the diagbox package.
Ensure that you load the diagbox package in the preamble of your LaTeX document by adding the following line.
\usepackage{diagbox}Use ‘\diagbox’ command
Within your table, you can now use the \diagbox command to create a cell with a diagonal line. The \diagbox command accepts two arguments, generating a box with a diagonal line extending from the northwest to the southeast direction. The syntax for \diagbox is as follows:
\diagbox{TextL}{TextR}TextL: It is the text to be placed on the left side of the line.TextR: It is the text to be placed on the right side of the line.
Replace TextL and TextR with the actual content you want to display in those positions. Here’s an example:
\documentclass{article}
\usepackage{diagbox}

\begin{document}

\begin{tabular}{|c|c|c|}
\hline
\diagbox{Room}{Date} & 6/27 & 6/1 \\
\hline
Office Room  & A & B \\
\hline
Library & C & D \\
\hline
\end{tabular}

\end{document}
Output
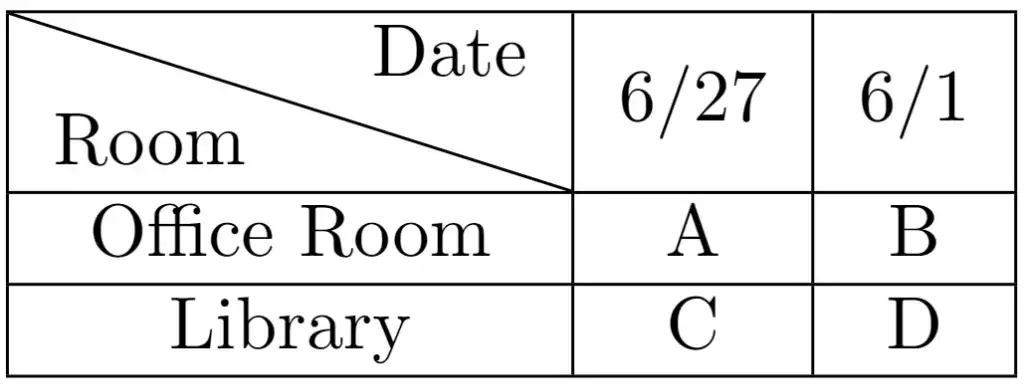
The above example generates a table to visually separate the room and date information. A diagonal line is created using the \diagbox command. The table contains information about different rooms and their status or availability on specific dates (6/27 and 6/1 in this case). Each row corresponds to a different room; the columns represent the dates with their respective information.
Note: \diagbox command can also accept three arguments to create a table header featuring two diagonal lines. For example:
\documentclass{article}
\usepackage{diagbox}

\begin{document}

\begin{tabular}{|l|c|c|c|}
  \hline
  \diagbox{Subject}{Exam}{Day} & Monday & Tuesday & Wednesday \\
  \hline
  Maths & 9:00 AM & 10:30 AM & 1:00 PM\\
  \hline
  Physics & 10:30 AM & 2:30 PM & 4:00 PM \\
  \hline
  English & 1:00 PM & 4:00 PM & 6:00 PM \\
  \hline
\end{tabular}

\end{document}
Output
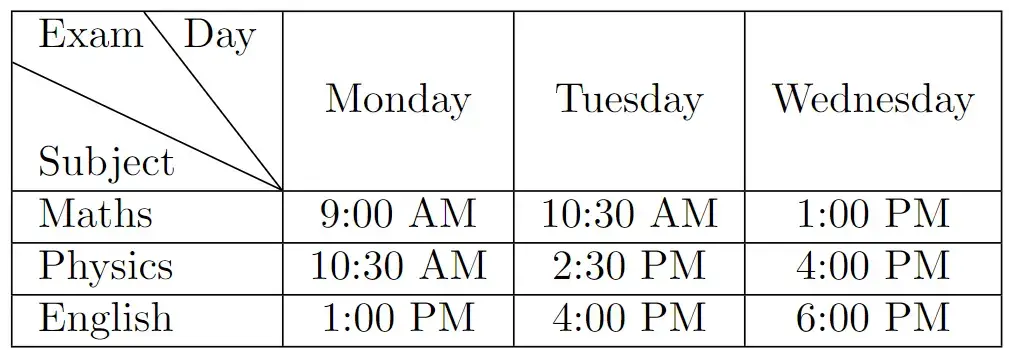
The above example generates a table displaying a schedule of exams for three subjects (Maths, Physics, and English) on Monday, Tuesday, and Wednesday, along with the corresponding exam times. The table header is created using \diagbox command to separate the subject, exam, and day information visually.
