The \cline command in LaTeX draws a partial horizontal line that spans only specific table columns. It is beneficial when highlighting specific cells or groups within a table. Here’s a guide on how to use \cline in LaTeX:
Basic Syntax:
The basic syntax of the \cline command is as follows:
\cline{p-k}pis the number of the starting column.kis the number of the ending column.
This command draws a horizontal line that spans from the starting column p to the ending column k. It will replace the line separating rows in that particular range with a partial line.
For Example:
Let’s consider a simple example of a table with three columns, and we want to draw a horizontal line that spans from column 2 to column 3:
\documentclass{article}

\begin{document}

\begin{table}[]
    \centering
\begin{tabular}{ccc}
  \hline
  Item & Quantity & Price \\
  \cline{2-3}
  Apple & 5 & \$1.00 \\
  Orange & 3 & \$0.75 \\
  Banana & 2 & \$0.50 \\
  \hline
\end{tabular}
\end{table}

\end{document}
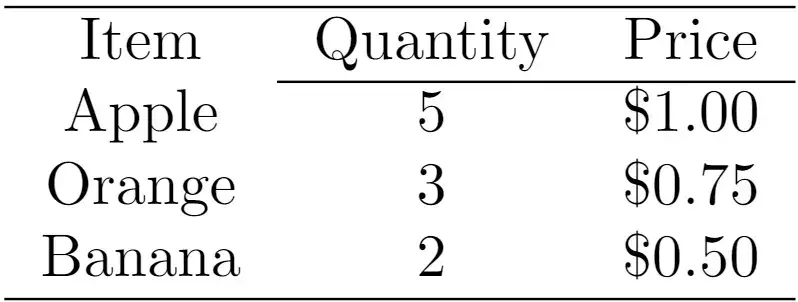
Output

In this example, the \cline{2-3} command draws a horizontal line that spans from column 2 (Quantity) to column 3 (Price). The resulting table will have a partial horizontal line separating the Quantity and Price columns.
Multiple ‘\cline’ Commands:
You can draw lines in different segments using multiple \cline commands in a single row. For example:
\documentclass{article}

\begin{document}

\begin{table}[]
    \centering
\begin{tabular}{ccc}
  \hline
  Item & Quantity & Price \\
  \cline{1-1}
  \cline{3-3}
  Apple & 5 & \$1.00 \\
  Orange & 3 & \$0.75 \\
  Banana & 2 & \$0.50 \\
  \hline
\end{tabular}
\end{table}

\end{document}
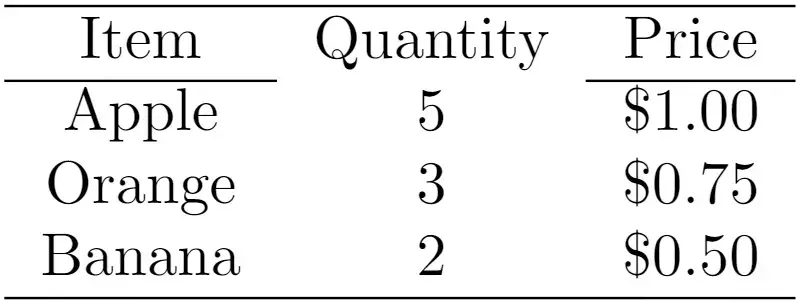
Output

In this case, two \cline commands are used. The first one, \cline{1-1}, draws a line only in the 1st (Item) column, and the second one, \cline{3-3}, draws a line only in the 3rd (Price) column.
Note: \cline is typically used within the tabular environment.
By using the \cline command effectively, you can enhance the visual appeal and readability of your LaTeX tables.
