LaTeX is a robust typesetting system commonly used to produce high-quality publications, particularly in the scientific and academic fields. LaTeX’s ease of handling complex tables is one of its main advantages. Although LaTeX offers a simple table environment, it lacks certain aspects necessary for producing tables that look professional. The booktabs package addresses these shortcomings and offers tools for producing visually appealing, publication-ready tables.
Introduction to the ‘booktabs’ Package
The booktabs package is designed to enhance the quality of tables in LaTeX documents. It introduces a set of guidelines and commands for making visually appealing and readable tables. This package is incredibly well-liked in academic and scientific writing, where the presentation of data and findings depends heavily on well-designed tables.
To use the booktabs package, you need to include it in your LaTeX document’s preamble using the \usepackage command:
\usepackage{booktabs}Now, let’s delve into the key features and commands provided by the booktabs package.
Basic Table Structure
Before exploring the advanced features of booktabs, let’s start with the basic structure of a table in LaTeX. The tabular environment is used to create tables and is often enclosed within a table environment to provide captions and labels.
\documentclass{article}

\begin{document}
\begin{table}
  \centering
  \begin{tabular}{<column_specifiers>}
    \hline
    <header_row> \\
    \hline
    <data_rows> \\
    \hline
  \end{tabular}
  \caption{Your table caption}
  \label{tab:your_label}
\end{table}

\end{document}- <column_specifiers>: Specifies the alignment and format of each column (e.g.,
lfor left-aligned,cfor centered-aligned,rfor right-aligned). - <header_row>: Contains the column headers.
- <data_rows>: Contains the actual data.
Basic ‘booktabs’ Commands
The booktabs package introduces three main commands for enhancing the appearance of tables: \toprule, \midrule and \bottomrule. These commands replace the traditional \hline command and provide better spacing and aesthetics.
\toprule: Adds a horizontal line at the top of the table.\midrule: Adds a horizontal line between the header and data rows.\bottomrule: Adds a horizontal line at the bottom of the table.
Let’s see these commands in action:
\documentclass{article}
\usepackage{booktabs}

\begin{document}

\begin{table}
  \centering
  \begin{tabular}{ccc}
    \toprule
    Name & Age & Grade \\
    \midrule
    Alice & 25 & A \\
    Bob & 30 & B \\
    Carol & 28 & C \\
    \bottomrule
  \end{tabular}
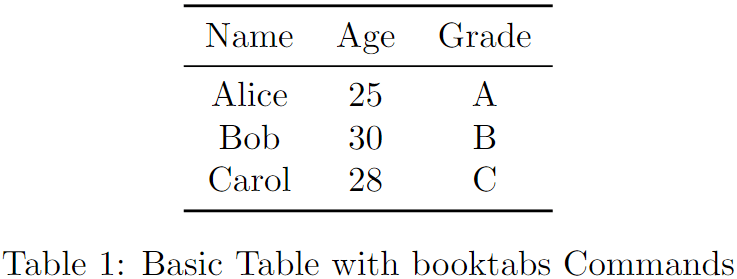
  \caption{Basic Table with booktabs Commands}
  \label{tab:basic_booktabs}
\end{table}

\end{document}
Output

In this example, \toprule adds a horizontal line at the top, \midrule adds a horizontal line between the header and data rows, and \bottomrule adds a horizontal line at the bottom. You can read our detailed guide on how to use \toprule, \midrule, and \bottomrule for more customization.
Vertical Spacing
One of the distinctive features of booktabs is its emphasis on proper spacing in tables. The package provides commands to control the spacing above and below horizontal lines:
\addlinespace[<length>]: Adds vertical space. The optional argument <length> specifies the space to add.
\documentclass{article}
\usepackage{booktabs}

\begin{document}

\begin{table}
  \centering
  \begin{tabular}{ccc}
    \toprule
    Name & Age & Grade \\
    \midrule
    Alice & 25 & A \\
    \addlinespace[0.5ex]
    Bob & 30 & B \\
    \addlinespace[1ex]
    Carol & 28 & C \\
    \bottomrule
  \end{tabular}
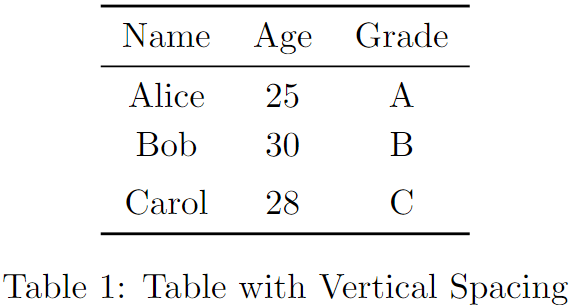
  \caption{Table with Vertical Spacing}
  \label{tab:vertical_spacing}
\end{table}

\end{document}
Output

In this example, \addlinespace is used to add additional vertical space between rows.
Improved Rules
booktabs also provides commands for creating rules with custom lengths and thicknesses. For example:
\cmidrule(<trim>){<start>-<stop>}: Adds a centered rule between header and data rows from column to column with optional trimming on the sides. For example:
\documentclass{article}
\usepackage{booktabs}

\begin{document}

\begin{table}
  \centering
  \begin{tabular}{cccccc}
    \toprule
    & \multicolumn{4}{c}{Scores} & \\
    \cmidrule(lr){2-5}
    Name & Math & Physics & Chemistry & Biology & Total \\
    \midrule
    Alice & 90 & 85 & 92 & 88 & 355 \\
    Bob & 88 & 90 & 85 & 89 & 352 \\
    Carol & 92 & 87 & 88 & 93 & 360 \\
    \bottomrule
  \end{tabular}
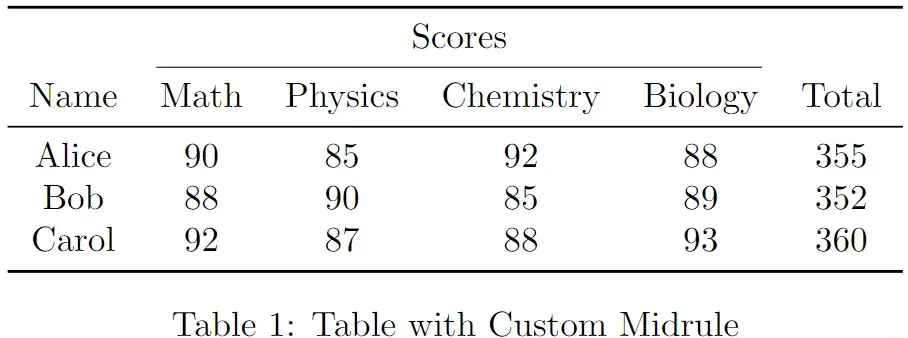
  \caption{Table with Custom Midrule}
  \label{tab:custom_midrule}
\end{table}

\end{document}
Output

Here, \cmidrule is used to add a centered rule that spans columns 2 to 5. You can read our detailed guide on how to use \cmidrule for more customization.
A valuable tool for producing professional and visually appealing tables in LaTeX is the booktabs package. By following its guidelines and utilizing its commands, you can produce tables that meet the highest standards for readability and presentation. Whether you are working on a research paper, a thesis, or any other document that requires tables, incorporating booktabs into your LaTeX workflow can significantly enhance the visual appeal of your work. To effectively develop tables communicating your data and findings, play around with the available commands and investigate extra customization choices.
